How to set up Canon iR-ADV C7260 department ID for job accounting on Mint 17
I have, sadly, spent more time than I care to admit trying to get the printer in our office to work. In the end, the solution was quite easy, but unintuitive, so I've decided to share it.
Obtain and install the driver
Go to the Canon software page, select your language (English), product (OfficePrint & Copy Solutions) and Model (imageRUNNER ADVANCE C7260i) and click "Go". That should get you to the ir-ADV C7260 product software page.
On the product software page, select your operating system (Linux) and language (English) and click "Submit". From the software list below, select the deb package: CQue 2.0.7 Linux Driver DEB 64-bit (v2.0.7).
Click on the download link for the deb package, read and accept the Software license agreement, and click "Download Software". If the download doesn't start automatically, there's also a direct link.
If you'd like to read some PR about this software, here's the Canon enterprise printing on Linux page.
Install the driver
Install the deb package into your system. Either with dpkg or gdebi-gtk if you want a graphical interface.
$ sudo dpkg --install ~/Downloads/g1489en_lindeb64_0207.debor
$ gdebi-gtk ~/Downloads/g1489en_lindeb64_0207.debThis will install the cque-en package into your system.
The package will be installed mostly into the /opt/cel/ directory.
There's also a "Quick" User Guide (46 pages) and a Reference Manual (98 pages) available in /usr/share/doc/CQue2.0/.
You can find loads of additional information there.
Add a printer to the system
Editing an existing printer with cque has never worked for me,
so I'll describe the process of adding a new printer to the system.
- Start the
cquegraphical interface as root.
$ sudo cque- Select "File" >> "Create" to add a new printer (queue) to the system.
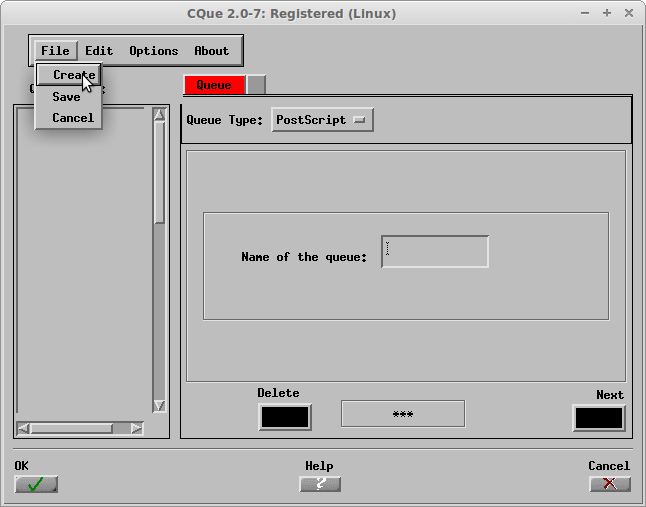
- Set the "Queue Type" to "PostScript"
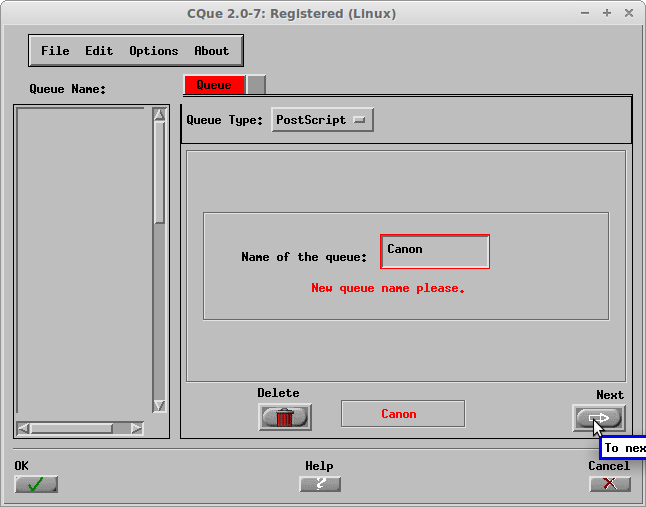
- "Name of the queue" will be the printer name in the system.
- Click "Next"
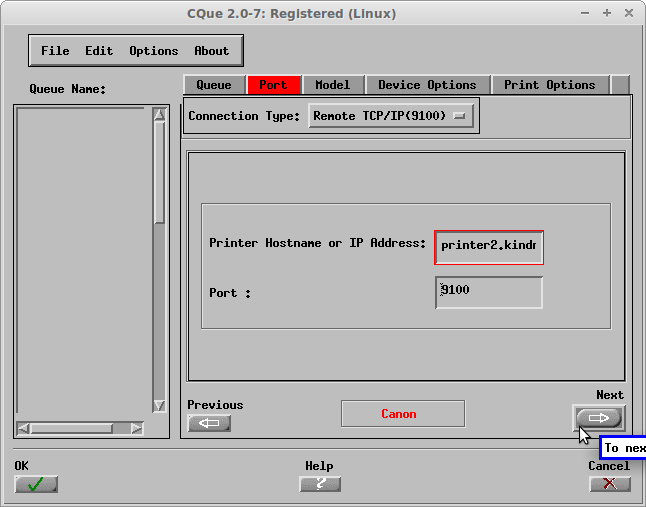
- Select "Remote TCP/IP (9100)" as "Connection Type".
- Set the "Printer Hostname or IP Address" to your printer IP.
- Specify the "Port". The default port is 9100.
- Click "Next".
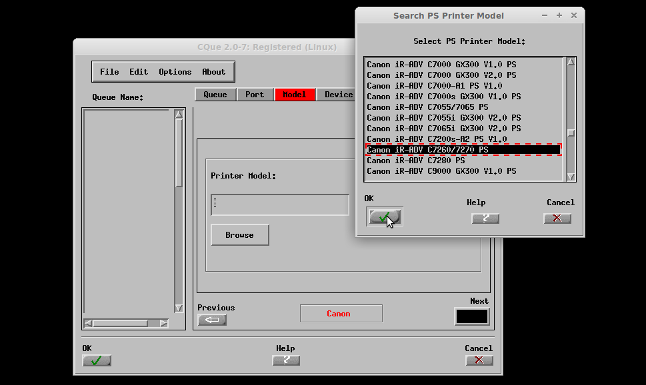
- Click "Browse" and select the appropriate printer model.
- Click "Ok".
- Click "Next".
- Set the "secured printing" option, if enabled on your printer.
- Click "Next".
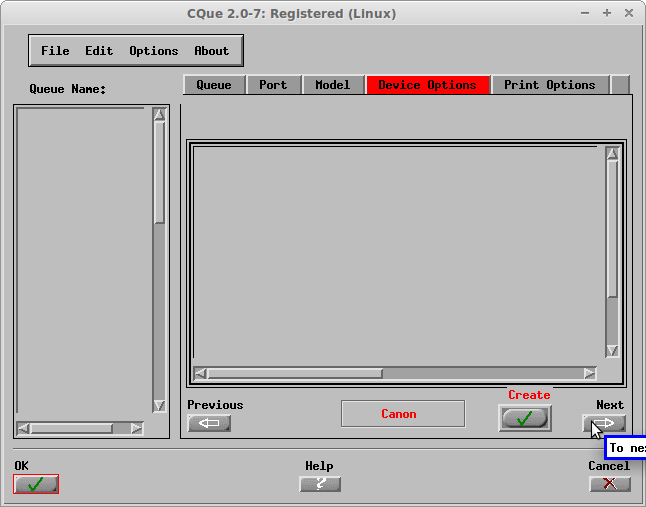
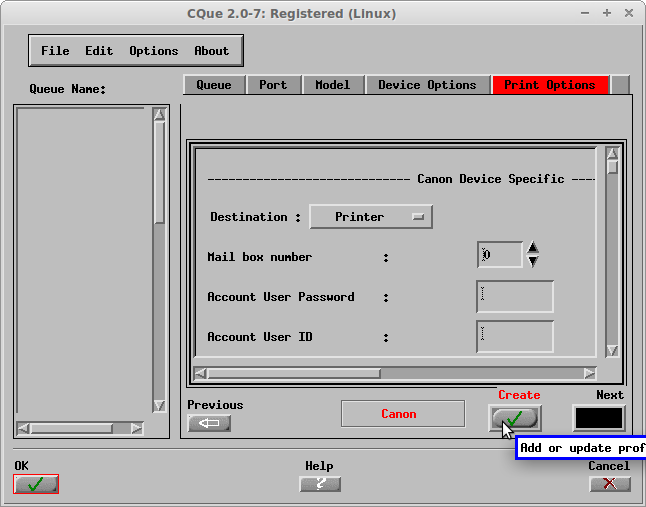
- If you want to use the "secured printing", enable it again in the "Printing options" again.
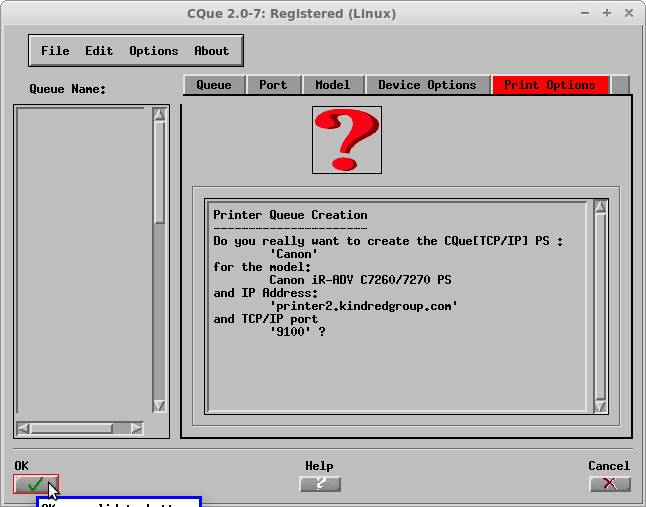
- Click "Create" to create the printer.
- Click "Ok" to confirm the printer creation.
At this point it may be necessary to restart
cque.
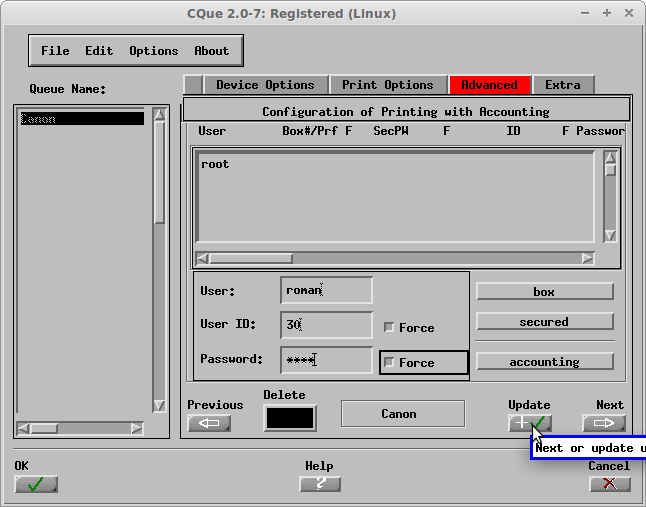
- Click on the printer name in the left frame, then click "Edit" >> "Advanced".
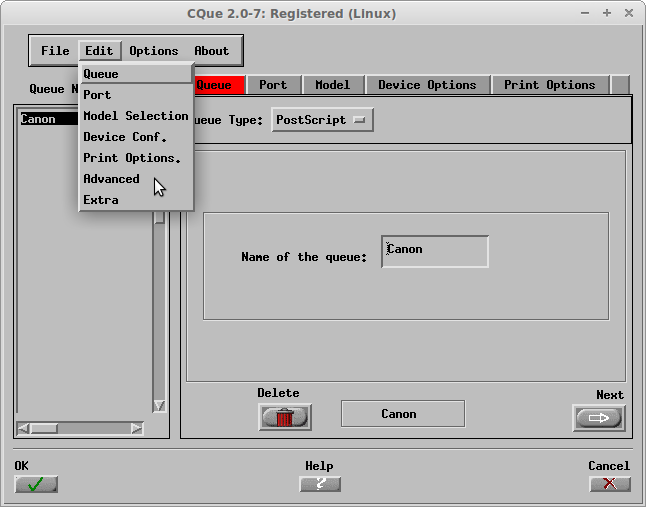
- Select "accounting".

- Fill in your "User", "User ID" (or department ID) and "Password".
- Select "Force" on both "User ID" and "Password" to enforce the policy.
- Click "Update".
- You can now close the window and try to print something.
Conclusions
Words of advice in the end: Do not change the name of the printer once it works. If you change the name in some cups interface, it will not effect the cque settings and you'll end up removing the printer in all interfaces and installing it again.
Good luck and thank you reading this far. As a reward, please enjoy this comic about Printers Sent From Hell To Make Us Miserable by the Oatmeal.